Locators
Build tests
Use locators to give your steps stable element references. In AppraiseJS, the best path is usually route-aware capture through the Chromium picker, not typing selectors blind.
Workflow context
Section titled “Workflow context”The locator creator matters because it sits between page discovery and durable test authoring. A good locator makes the case editor faster and the rerun more reliable.
Create locators ahead of time
Section titled “Create locators ahead of time”UI path
Use this path when you want reusable locators prepared before test case creation.
- Open
Locators -> Create. - Choose whether to launch from a saved environment or a direct URL.
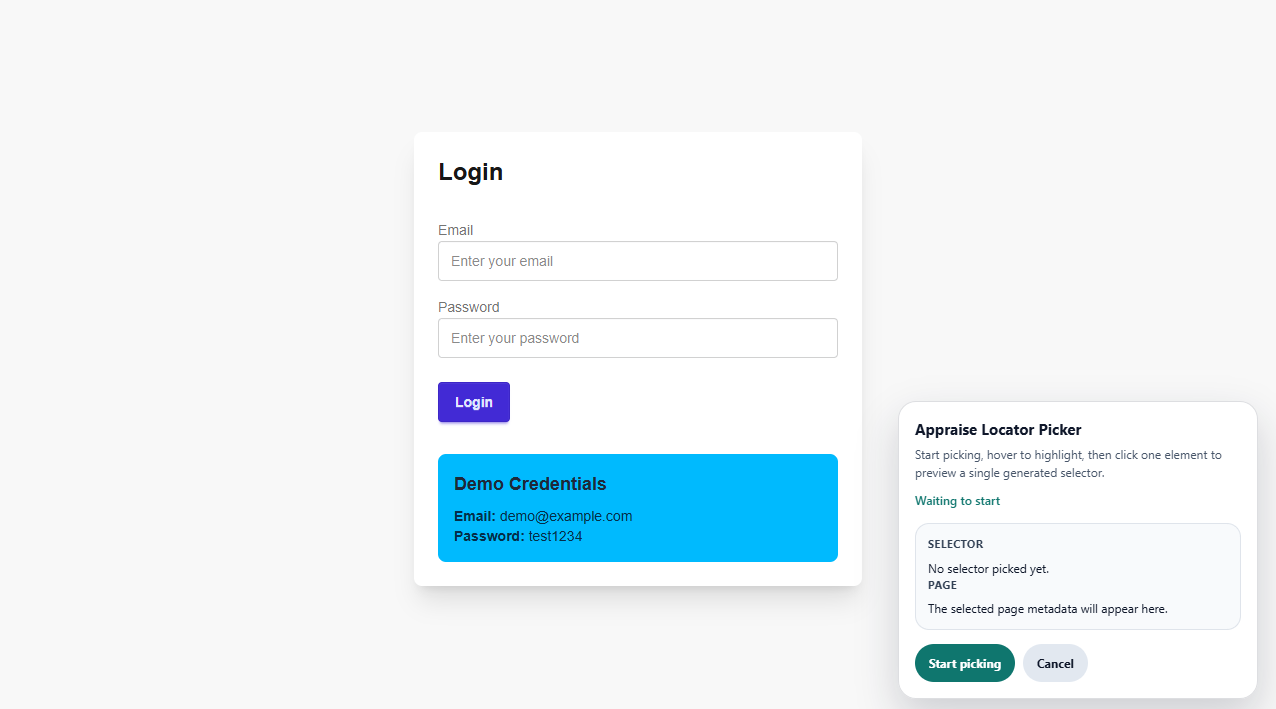
- Start the Chromium picker and navigate to the target page state if needed.
- Click
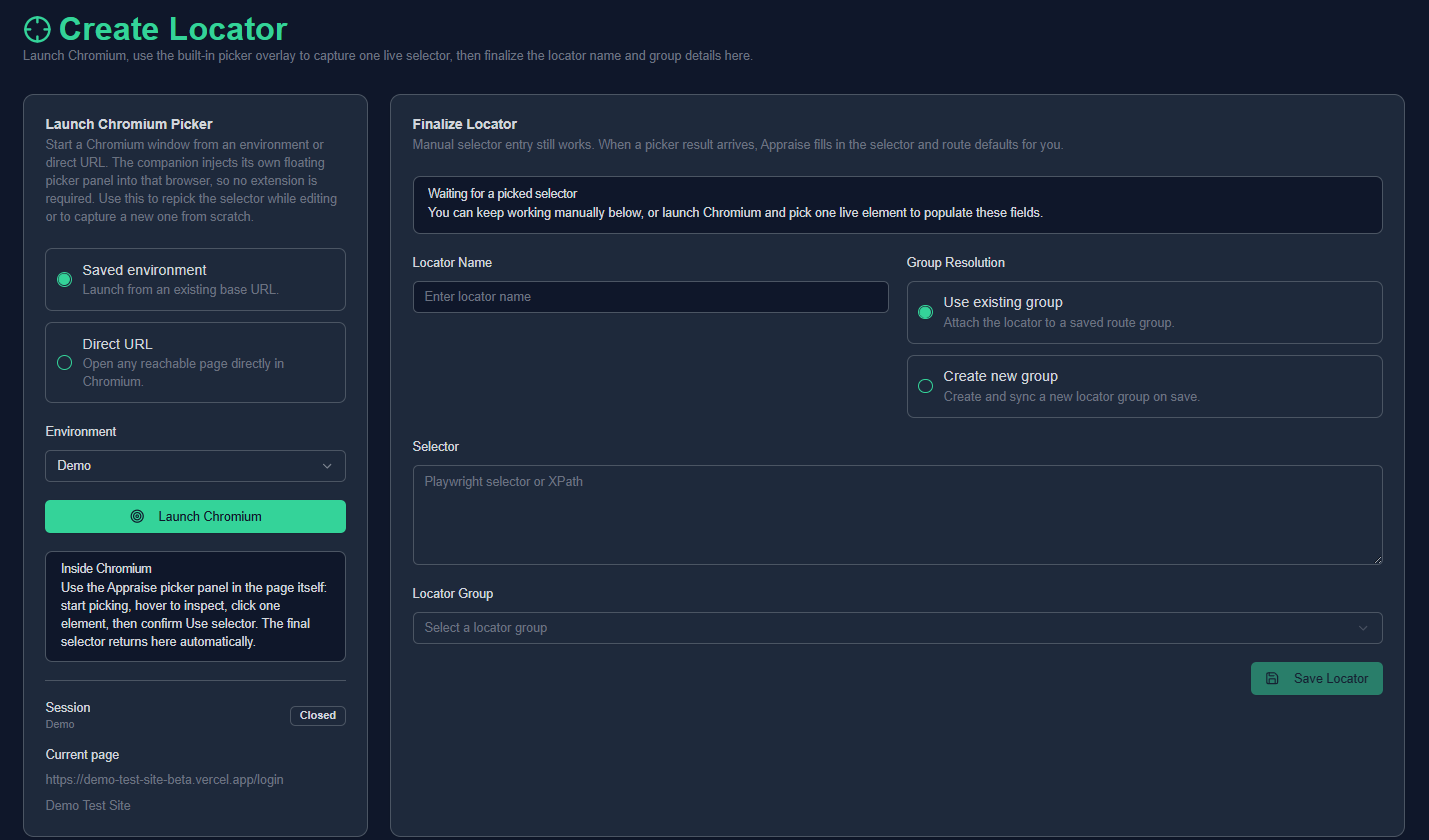
Start picking, select the element, review the proposed selector, then confirm it. - Review the autofilled locator name, selector value, route, and locator group suggestion.
- Save the locator to an existing group or create a new route-aware group before saving.
Below is a screenshot of the locator creator in action.
Below is a screenshot of the locator picker in action.
Here is the complete flow of creating a locator.
Create locators while adding a step
Section titled “Create locators while adding a step”You can also create needed locators directly from the node addition sidebar while building a test case. This is the smoother path when you are already in the test case creation flow and discover that an input, click, or assertion step needs a new element reference.
- Open the test case form.
- Add a node from the flow builder.
- Choose the step type that needs an element.
- Use the node addition sidebar to create a locator or select an existing one.
- Save the node and continue building the flow.
Minimal example
Section titled “Minimal example”- Group:
Login Page - Route:
/login - Locators:
emailInput,passwordInput,submitButton,welcomeBanner
What good looks like
Section titled “What good looks like”- The locator name is readable and specific.
- The selector is stable enough to survive layout changes.
- The locator group route matches the page where the step actually uses the selector.
- Locators created during test case creation are named clearly enough to reuse later.
Next step
Section titled “Next step”Continue to Test Cases to see how locator references become executable steps.