Installation
Setup
Install AppraiseJS with the official bootstrapper, complete the recommended production-first setup flow, and confirm the local app is ready. Alternatively, you can clone the repository and set up the project in development mode for contributing to the project.
Preconditions (don’t skip this)
Section titled “Preconditions (don’t skip this)”- Node.js 18+ is installed and available in your PATH.
- You can run your package manager from terminal (`npm`, `pnpm`, `yarn`, or `bun`).
- You are NOT trying to clone or manually assemble the project — use `create-appraisejs` unless you have a specific reason not to.
Quick install (for experienced users)
Section titled “Quick install (for experienced users)”npx create-appraisejs@latestcd <your-project-name>npm run startIf this fails, follow the full setup guide below.
What you’ll finish with
Section titled “What you’ll finish with”A production-ready local scaffold
A working local AppraiseJS instance that you have actually opened in the browser, backed by a clean automation workspace (no demo artifacts), and a known-good baseline you can trust before writing tests.
Step-by-step procedure
Section titled “Step-by-step procedure”AppraiseJS allows users to create a new project in two different ways:
- Using the official bootstrapper:
npx create-appraisejs@latest - Cloning the repository:
git clone https://github.com/appraisejs/appraisejs.git
Using the official create-appraisejs bootstrapper is the recommended way to get started with AppraiseJS. It is not advisable to clone the repo unless you are trying to contribute to the project as it contains a lot of files that are not needed for a local development environment.
Why the bootstrapper is recommended
Section titled “Why the bootstrapper is recommended”AppraiseJS is designed to produce a clean, production-ready automation workspace from the start.
Cloning the repository includes:
- internal development tooling
- example configurations not intended for end users
- additional complexity that does not reflect real usage
The bootstrapper ensures:
- a minimal, production-aligned setup
- a clean automation workspace (no demo artifacts)
- correct dependency and script configuration for your environment
Setting up a new project with the official bootstrapper
Section titled “Setting up a new project with the official bootstrapper”Open a terminal and run the following commands:
npx create-appraisejs@latestcd <your-project-name>npm run setup # only if you skipped setup during scaffoldingnpm run startThe examples on this page use npm and the bootstrapper package is optimized
for npm. However, if you want you can use pnpm, yarn, or bun instead. The
scaffold will rewrite the scripts and print the next commands for the package
manager you selected.
Create-AppraiseJS allows you to create a new AppraiseJS project with a bundled template and get you started with a running local app without manually configuring a project from scratch.
What the scaffold does
Section titled “What the scaffold does”Project setup
Section titled “Project setup”- Creates a runnable project — not a partially configured template.
- Prompts for the target directory.
- Prompts for the package manager:
npm,pnpm,yarn, orbun.
Environment setup
Section titled “Environment setup”- Prompts for whether to run production setup immediately.
- Prompts for which Playwright browsers to install.
- Runs the project
setupscript and installs the selected Playwright browsers if you opt into setup during scaffolding. - Prints the exact next commands to run if you skip setup during scaffolding.
Automation workspace initialization
Section titled “Automation workspace initialization”- Uses the bundled template by default.
- Preserves the seeded SQLite database at
prisma/dev.db. - Resets the automation workspace so
automation/config/environments/environments.jsonstarts as{}andautomation/mapping/locator-map.jsonstarts as[]. - Includes reusable step definitions, but does not bundle starter features, locators, or reports.
Configuration handling
Section titled “Configuration handling”- Rewrites generated project scripts to match the selected package manager.
Nothing in this step is “magic.” You should end up with a standard project structure you can inspect, modify, and run independently of AppraiseJS if needed.
After startup, open the local URL shown in the terminal. If the app does not
load in your browser, stop here and fix that before continuing. npm run dev is
available for iteration, but onboarding assumes npm run start works first.
If you’re unsure what “success” looks like, watch the full flow below. Your setup should match this end-to-end without deviations.
End-to-end first-run setup from scaffold to running local app
Section titled “End-to-end first-run setup from scaffold to running local app”After startup, your UI should match the state below. If it doesn’t, do not continue — something is off in your setup.
First successful loaded app state after npm run start
Section titled “First successful loaded app state after npm run start”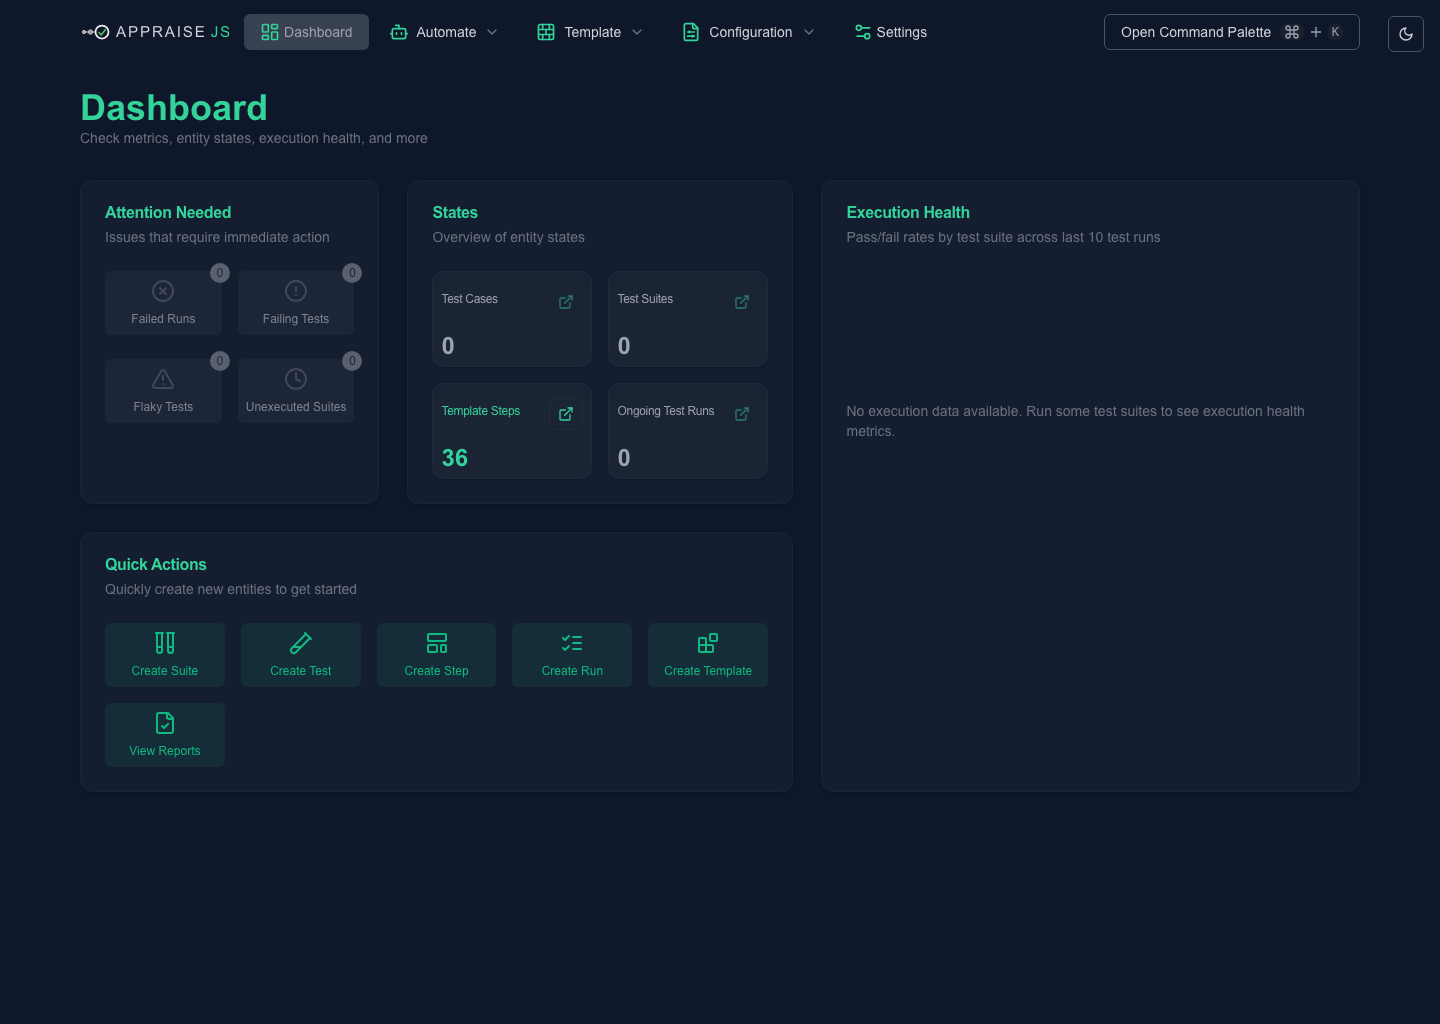
When these assets exist, the user should be able to compare their local result against them before deciding whether to continue or switch to Troubleshooting.
Checkpoint
Section titled “Checkpoint”- The app starts without errors.
- You can open the UI in your browser.
- The UI is not blank, broken, or stuck loading.
prisma/dev.dbexists.- Automation workspace files are empty (not prefilled with demo data).
- You are confident this environment is stable enough to proceed.
Common mistakes
Section titled “Common mistakes”- Skipping setup and assuming the app will still run.
- Trying to debug UI issues before confirming the app even loads.
- Assuming missing browsers or dependencies are AppraiseJS bugs.
- Expecting prebuilt test data or examples to exist.
- Continuing forward without verifying the app actually works locally.
Where setups usually fail
Section titled “Where setups usually fail”Most setup issues fall into one of these categories:
- Environment issues (Node, package manager, PATH)
- Skipped setup steps (Playwright, migrations)
- Browser dependencies not installed
- Misinterpreting a partially working UI as success
If something feels off, assume setup is incomplete — not that AppraiseJS is broken.
Recovery steps
Section titled “Recovery steps”- If the app never loads: stop and re-run setup instead of continuing blindly.
- Migration errors: run
npm run migrate-db. - Browser dependency errors: run
npm run install-playwright. - Stale or missing generated entities after setup: use
Settings -> Syncafter the UI loads, or runnpm run sync-allif the UI is unavailable.
Next step
Section titled “Next step”Continue to Quick Start to create the smallest useful runnable flow.